How to Install Paver Lights?
SHONETable of Contents
You can install paver lights in your outdoor space with some planning and the right tools. Start by deciding where you want the lights, then drill holes and run wires. Test each light before you finish. Safety matters, so wear gloves and eye protection.
Tip: Installing paver lights is a project you can handle yourself. Take your time and enjoy making your yard look amazing!
Key Takeaways
- Think about your layout before you begin. Choose spots for lights that make things safe and look nice.
- Get all your tools and materials ready first. This helps you work faster and makes fewer mistakes.
- Safety is very important. Put on gloves and eye protection when you use tools or lift heavy things.
- Check each light after you put it in. Make sure the wires are tight and the lights work before you finish.
- Clean and seal your paver lights often. This helps them last longer and keeps them looking good.
Tools and Materials
Getting ready for your paver lights project starts with gathering the right tools and materials. You want to make sure you have everything on hand before you begin. This saves time and helps you avoid mistakes.
Tools List
Here’s a list of tools you’ll need for a smooth installation:
- Wire stripper – You’ll use this to remove insulation from wires.
- Crimp tool – This helps you connect wires securely.
- 6-in-1 screwdriver – Handy for different screw types.
- Silicone filled connectors – These keep moisture out of your electrical connections.
- 12 gauge low voltage landscaping wire – Connects your lights to the transformer.
- Voltmeter voltage detector – Checks if your wiring works correctly.
- Wire and edging trencher – Makes shallow trenches for your cables.
Tip: Always wear gloves and eye protection when working with tools. Safety first!
Materials List
Choosing the right materials makes your paver lights last longer. You want something tough and weather-resistant. Here are some top picks:
- Porcelain pavers: These resist stains and water. They don’t crack or chip easily, even in freezing weather.
- Natural stone: Looks great but needs more care. It may not handle extreme weather as well as porcelain.
- Silicone connectors: Keep your wiring safe from moisture.
- Low voltage wire: Works well for outdoor lighting.
|
Material |
Durability |
Weather Resistance |
Maintenance |
|---|---|---|---|
|
Porcelain Pavers |
High |
Excellent |
Low |
|
Natural Stone |
Medium |
Good |
High |
Optional Items
Want to make your walkway stand out? You can add some extras for style and safety:
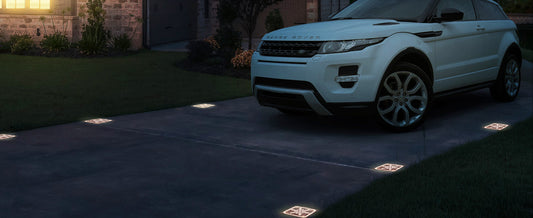
- Lighted paver bricks for a bold look at your driveway entrance.
- Guiding edge lights to help people see the path.
- Color-changing paver lights for a modern vibe.
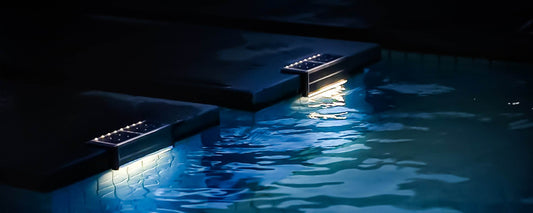
- Solar lights for easy installation and energy savings.
- LED lights that last a long time.
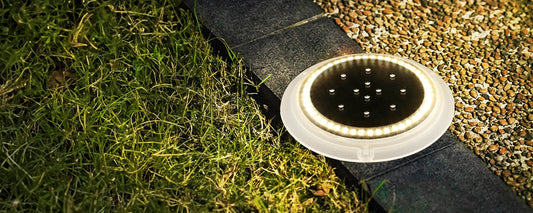
- In-ground lights for a clean, simple look.
- Path lights to highlight walkways.
- Hanging string lights for a fun touch.
- Bollard lights for a sleek, modern feel.
Planning your layout matters. Think about where you want each light and how they fit with your landscape. Make sure you have power sources ready for your chosen lights.
Planning
Before you start digging or drilling, take some time to plan your project. Good planning helps you save money and makes your paver lights last longer. You want your outdoor space to look great and feel safe, so think about your layout and budget first.
Layout
Start by deciding what you want your lights to do. Do you want to make your walkway safer at night, or do you want to show off your garden? Maybe you want both! Think about where people walk and where you want to highlight special features.
- Make sure you space your lights evenly. This gives you a nice, uniform look and helps every area shine bright.
- If you use solar lights, check how much sunlight each spot gets during the day. Some places might be too shady for solar panels to work well.
- Choose energy-saving options like LED or solar lights. These save you money and help the planet.
Planning your layout before you start makes the whole project easier and helps you avoid mistakes.
Here’s a simple step-by-step plan for your layout:
- Decide how many lights you need and where to put them.
- Gather all your tools and materials.
- Clear and level the area where you’ll work.
- Lay out your lights and make sure they’re even.
- Connect and secure the lights.
- Test everything before you finish up.
Marking
Accurate marking is key for a neat installation. Use a tape measure or ruler to check your distances. Chalk lines help you draw straight guides on the ground. You can also use a string line tied between two stakes to mark where each light will go. A laser level helps you keep everything lined up.
- Double-check your marks before you start cutting or drilling.
- Mark each spot clearly so you don’t get mixed up.
Safety
Safety should always come first. When you work with tools and heavy pavers, protect yourself. Here’s a quick safety checklist:
|
Safety Precaution |
Description |
|---|---|
|
Protective Gear |
|
|
Ear Protection |
Use earplugs if you’re using loud tools. |
|
Proper Lifting Techniques |
Bend your knees and lift with your legs, not your back. |
|
Work in Small Sections |
Take breaks and don’t rush. |
|
Clean Up Regularly |
Keep your work area tidy to avoid trips and falls. |
Stay safe and take your time. Careful planning and safety steps help you enjoy your new lights for years to come.
Preparing Site
Getting your site ready is a big step in installing paver lights. You want a stable and safe foundation so your lights last for years. Let’s break down the process into easy steps.
Remove Pavers
Start by clearing the area where you plan to install your lights. Take away grass, roots, and any debris. Next, look at your paver layout and pick out which pavers you need to remove. Put on your gloves and safety glasses. Make sure you stand on solid ground.
You can make simple paver pullers from wire hangers to help lift the pavers. Use a pry bar or a flat shovel to gently loosen each paver. If a paver feels stuck, tap it lightly with a rubber mallet. Keep working around the edges until you can lift it out. Try not to rush—this helps you avoid breaking the pavers.
Tip: Always double-check your marks before removing any pavers. This keeps your layout neat.
Core Drill
Now you need to make holes for your light fixtures. A 2" core drill bit works best for this job. It creates the right size hole for most paver lights. Place the paver on a stable surface before you start drilling. Hold the drill steady and go slow. This helps you avoid cracks or chips.
After drilling, clean out any dust or small pieces from the hole. Your paver is now ready for the light fixture.
Cable Placement
You want your cables to stay safe and easy to reach later. Use a 1" SCH40 PVC conduit to run your wires under the pavers. Cap the ends of the conduit to keep out dirt and water. If you think you might add more lights in the future, put in extra conduit now.
Running wires without conduit can cause problems. The gravel and sand under pavers can damage the cable over time. Using conduit protects your wires and makes repairs easier.
Note: Place the conduit before you reinstall the pavers. This saves you time and trouble later.
Now your site is ready for the next steps!
Paver Lights Installation
Place Paver Lights
Now comes the fun part—putting your paver lights in place! You want your lights to look even and bright, so start by measuring out equal spaces for each one. Use a tape measure to keep things neat. Mark each spot with a stake or a bit of landscaping paint. This helps you remember where every light should go.
Next, follow the instructions from the light manufacturer to put your lights together. Start at one end of your patio or walkway. Insert the first light’s spike into the ground or the hole you drilled in the paver. If the ground feels hard, use a small shovel or garden trowel to loosen the soil. Keep going down the line, placing each light at the marked spots. Take your time to check that every light sits straight and level.
Tip: If you need to run a power cable under the edge of your patio, pick up the border pavers first. Lay the cable in a conduit underneath, then put the pavers back when you finish.
Secure Fixtures
You want your paver lights to stay put, even if people walk or drive over them. After you place each light, make sure it fits snugly in the hole. Some lights come with clips or brackets to hold them in place. If yours do, snap or screw them in now. For a tight fit, you can add a little sand or gravel around the base of the fixture. This keeps the light from wiggling.
Double-check that each fixture sits flush with the top of the paver. If it sticks up too high, it could be a tripping hazard. If it sits too low, water might collect around it. Adjust as needed so every light looks just right.
Connect Wiring
Wiring your paver lights takes a little patience, but you can do it! Start by choosing a wiring method. Many pros like the T method. This uses thicker wire and makes it easier to add more lights later. Some people use the daisy chain method, but this can cause the last lights in the line to look dim. The hub technique can get messy and cost more in the long run. Most folks skip the loop method because it’s hard to fix if something goes wrong.
Here are some tips for wiring your lights:
- Always use low voltage wire made for outdoor use.
- Run the wire through a conduit under the pavers to protect it from damage.
- Use silicone-filled connectors to keep water out of your connections.
- Make sure all outdoor outlets have GFCI protection. This keeps you safe from shocks.
- If your lights use line voltage, check that the fixtures are rated for wet locations.
- Use watertight electrical boxes if you mount anything above ground.
You might need a permit if you add a new circuit. If you’re just adding lights to an existing setup, you usually don’t need one. Still, check your local rules before you start. Not following the code can lower your home’s value.
Once you connect the wires, test each light before you put the pavers back. If a light doesn’t turn on, check your connections and try again. When everything works, you’re ready for the finishing touches!
Finishing
Reinstall Pavers
You’re almost done! Now, put the pavers back in place. Start by laying each paver gently over the cables and light fixtures. Make sure every paver sits flat and lines up with the others. If you see any gaps, fill them with sand or gravel. Use a rubber mallet to tap the pavers so they fit snugly. Double-check that the lights sit flush with the surface. This helps prevent trip hazards and keeps your walkway safe.
Tip: Sweep polymeric sand into the joints. This keeps weeds out and locks the pavers together.
Test System
Before you celebrate, test your new setup. Turn on the power and check each light. Walk around and look for any dim or flickering bulbs. Make sure all the lights work and the area looks bright. You want to confirm everything is safe and ready for use.
Here’s a quick table to help you check your installation:
|
Testing Procedure |
Description |
|---|---|
|
Go through a checklist to make sure everything looks good and works safely. |
|
|
Hazard Identification |
Look for any hazards, like loose wires or uneven pavers. |
|
Safety Standards and Regulations |
Make sure you followed safety rules, like wearing gloves and using GFCI outlets. |
|
Drainage System Inspection |
Check that water drains away from the lights and pavers. |
Note: Good drainage keeps your paver lights working longer and prevents sinking or water damage.
Troubleshooting
Sometimes, things don’t go as planned. Here are some common problems and easy fixes:
- Sinking pavers mean you might have drainage issues or a weak base. Fix the base and improve drainage before reinstalling.
- Weed growth in the joints can happen if you skip polymeric sand or geotextile fabric. Add these to keep weeds away.
- Trip hazards show up when pavers aren’t level. Compact the base and adjust the pavers to fix this.
- Leaning edges happen without solid edging. Install a sturdy edge system to keep everything in place.
If you run into electrical issues, check your connections and make sure the wires stay dry. Sometimes, a light won’t turn on because of a loose wire or a bad connector. Take your time and fix each problem step by step.
You did it! Enjoy your new outdoor space with bright, safe paver lights.
You can install paver lights by following a few simple steps. First, gather your tools and plan your layout. Next, remove pavers, drill holes, and place your lights. Always focus on safety and double-check your work. Regular cleaning and sealing help your lights last longer. If you feel unsure about wiring, reach out to a professional. Enjoy your brighter, safer outdoor space!
Remember, good planning and safety make your project a success. You will love the new look and feel of your yard.
FAQ
How deep should I bury the wires for paver lights?
You should bury the wires at least 6 inches deep. This keeps them safe from damage. Use conduit for extra protection. Always check for other buried utilities before you dig.
Can I install paver lights if I already have pavers?
Yes, you can. Just lift the pavers where you want to add lights. Drill holes for the fixtures and run the wires underneath. Take your time to avoid breaking any pavers.
Do paver lights use a lot of electricity?
No, most paver lights use LED bulbs. These use very little electricity. You can run many lights on one transformer. This helps you save money on your energy bill.
What if a paver light stops working?
First, check the wiring and connectors. Sometimes a loose wire causes problems. Replace the bulb if needed. If you still have trouble, test the transformer. You can always call a professional for help.
Can I use solar paver lights?
Yes! Solar paver lights are easy to install. You do not need to run wires. Just make sure each light gets enough sunlight during the day. Clean the panels often for best results.


