How to Select in Ground Paver Lights that Cars can Drive Over?
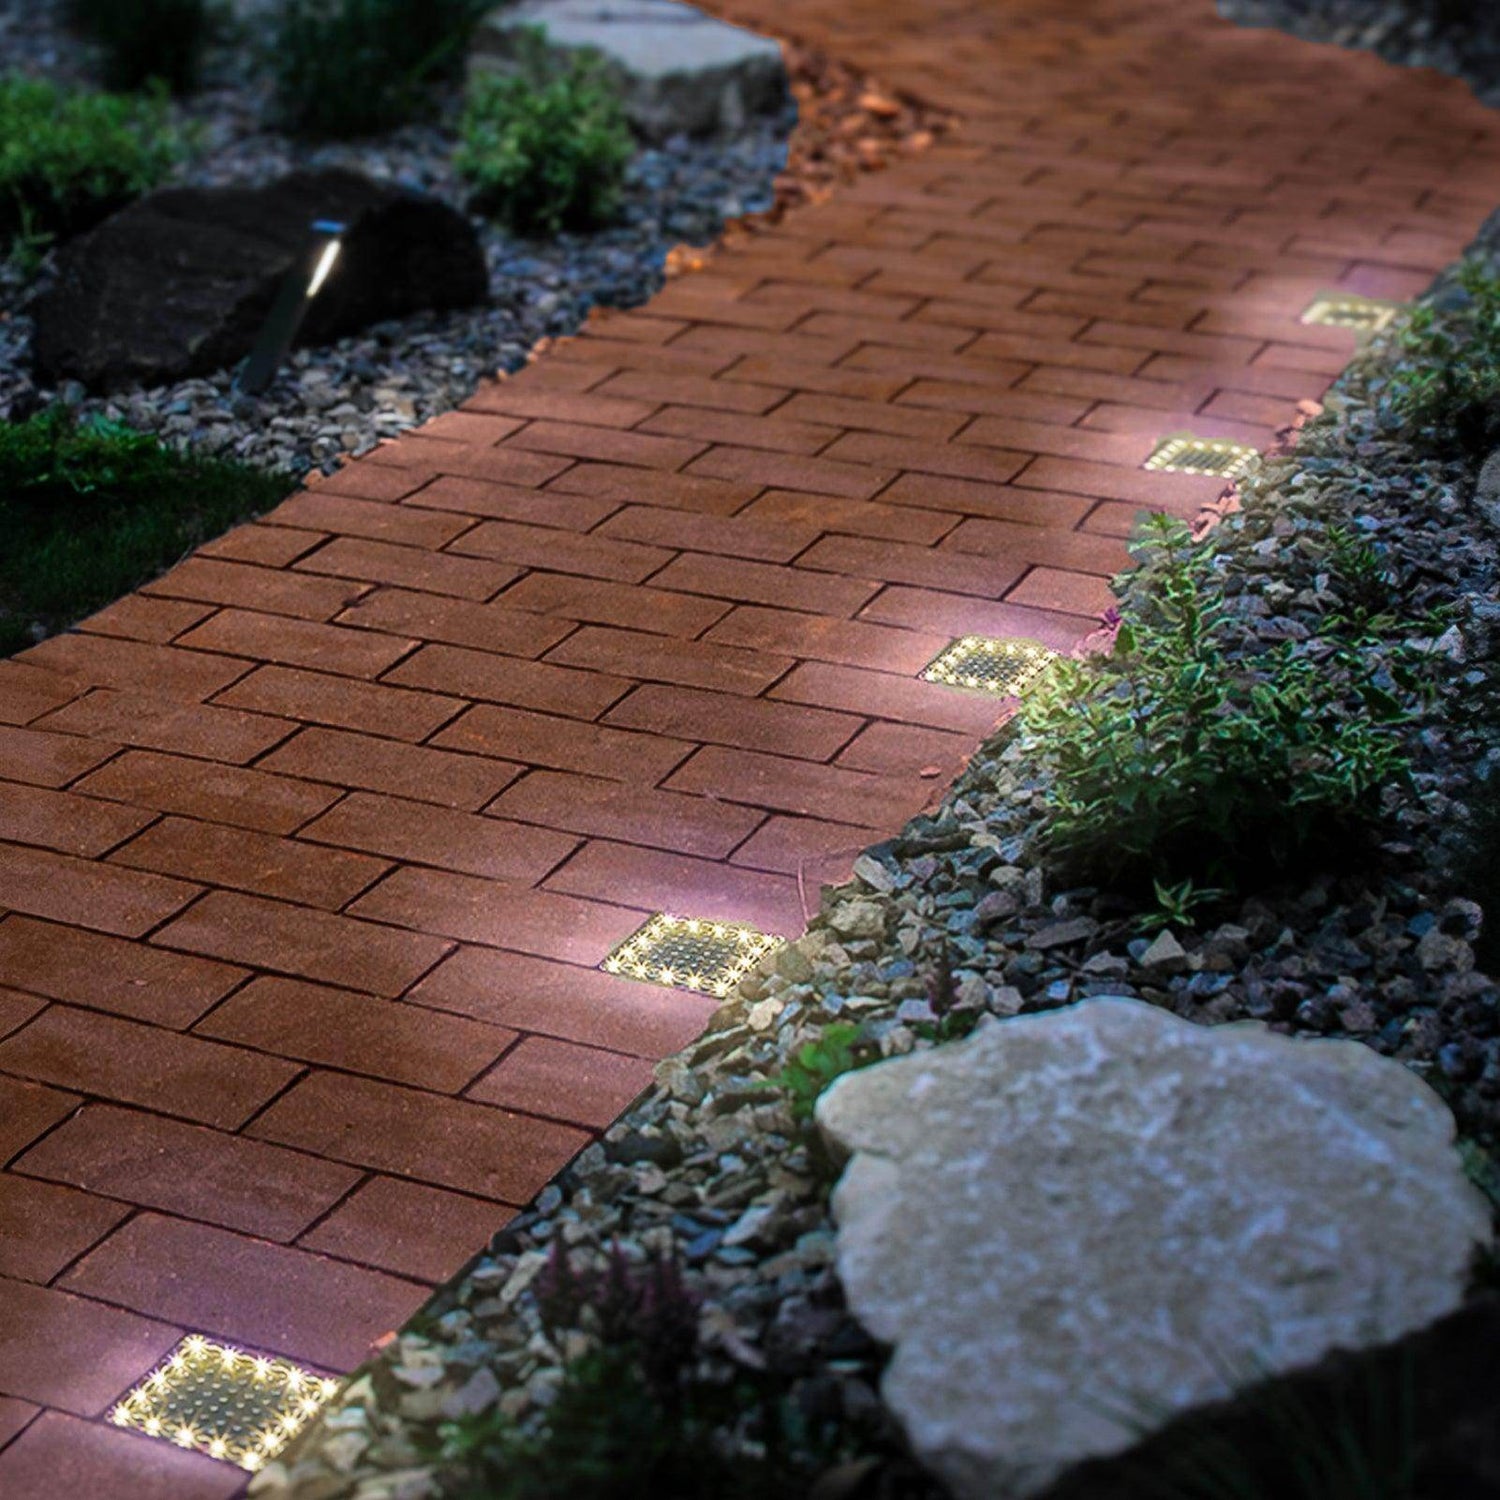
SHONE When you pick in ground paver lights for places cars drive, always pick lights made for cars to drive over. Choose lights with tough materials and a waterproof design. Make sure the lights are flat or just a little raised so people do not trip. A strong setup helps if the pavers move and keeps the lights safe. Put the lights in the right spots and install them tightly. This will help your lights last longer and keep everyone safe.
Key Takeaways
- Pick in ground paver lights that are safe for cars to drive over. This helps keep people and cars safe.
- Choose lights made from tough materials like stainless steel or solid glass. These materials can handle heavy cars and bad weather.
- Make sure the lights are waterproof and have a high IP rating. This stops water from getting in and causing problems.
- Put the lights level with the ground. This keeps people from tripping and lets cars drive smoothly over them.
- Space the lights 6 to 12 feet apart. This gives even light and keeps the area safe.
- Pick lights with anti-slip surfaces. This helps stop people from slipping when it is wet.
- Check and clean your paver lights often. This keeps them working well and looking nice.
- If you do not know how to install the lights, hire a professional. This makes sure the job is safe and follows local rules.
What are the key features of in ground paver lights?

Stability with Shifting Pavers
You want your in ground paver lights to stay secure even if the ground moves. Driveways and walkways often shift over time because of weather or heavy use. If the lights do not have a stable base, they can tilt or pop out. Choose lights with a sturdy mounting system. Some models use a deep housing or anchor brackets to hold the fixture in place. This design helps the light stay level and safe, even if the pavers move a little. You should also look for lights that allow for some flexibility in installation. This way, you can adjust them if the pavers settle or shift.
Spacing and Placement
Proper spacing and placement make a big difference in both safety and appearance. If you place the lights too close together, the area may look too bright and uneven. If you space them too far apart, you might have dark spots that reduce visibility. For most driveways, you should space in ground paver lights about 6 to 12 feet apart. This range gives you enough light for safety and a balanced look. You can adjust the spacing based on your needs and the effect you want. For example, tighter spacing works well for highlighting a path, while wider spacing suits larger driveways.
Tip: Plan your layout before installation. Mark the spots where you want each light. This step helps you avoid mistakes and ensures even coverage.
Light Source Options
You have several choices for the type of light source. Most in ground paver lights use LED bulbs. LED last a long time and use less energy than traditional bulbs. Some lights offer warm white tones for a cozy look, while others provide cool white for a modern feel. You can also find color changing options if you want to create special effects or highlight certain areas. When you pick a light source, think about how much light you need and the mood you want to set. LED work best for most outdoor settings because they handle weather changes and last for years.
Anti-Slip Surface
When picking in ground paver lights, think about the surface texture. An anti-slip surface keeps people and cars safe. Rain or snow can make smooth surfaces slippery. You need a light that lowers the chance of slipping. Many makers use textured glass or etched metal for better grip. These features help stop accidents.
Slip resistance is important where people walk or cars drive. Look for products that follow safety standards. The Americans with Disabilities Act (ADA) and Dynamic Coefficient of Friction (DCOF) give rules for slip resistance. The table below shows the ratings for in ground paver lights:
|
Standard |
Slip Resistance Rating |
|---|---|
|
≥ 0.42 |
|
|
DCOF Wet Values |
0.6 to 0.75 |
Lights with these ratings give better traction. Check the product details for these numbers. If the rating is lower, the light may not grip well. Always pick paver lights that meet or beat these safety standards.
Tip: Ask your supplier about slip resistance tests. Good brands share test results for their products. This info helps you choose safe lights for your driveway or patio.
Think about the material of the light cover too. Solid glass with a frosted finish or stainless steel with a brushed texture works well. These materials last long and keep their anti-slip quality. Do not pick lights with smooth, shiny surfaces. They can be dangerous when wet.
In ground paver lights with anti-slip surfaces help cars keep traction. Tires grip better on textured surfaces and do not skid as much. This is important in busy areas or places with lots of rain.
When planning outdoor lighting, add anti-slip features to your list. You keep your family, guests, and cars safe by picking strong paver lights. Many new paver lights have anti-slip surfaces, waterproof design, and drive-over ratings. This mix gives you safe and long-lasting lights for your outdoor space.
What should you think about when picking in ground paver lights?

Drive-Over Rating
Check the drive-over rating before you buy lights. This rating shows if cars can drive over the light without breaking it.
Weight Capacity
Find out how much weight the light can hold. Most driveways have cars and small trucks. Some places might have bigger vehicles. Makers tell you the highest weight each light can take. Some lights hold up to 2 tons. Others can handle even more weight. Pick a light that can hold more than your heaviest car. This keeps your lights safe and stops them from breaking.
Tip: Ask your supplier for technical sheets. These papers show weight limits and help you compare lights.
Testing Standards
Good paver lights go through tough tests. Look for lights tested by groups like EN 60598 or ASTM. These tests check if the light is strong and lasts a long time. Makers often share test results or certificates. Read these before you buy. Lights that pass these tests are safer and work better.
Material Strength
The materials in your lights need to be strong. Strong materials do not crack, chip, or rust. You want lights that last for years, even with cars driving over them.
Stainless Steel
Stainless steel is a great choice for paver lights. It does not rust and can handle bad weather. The metal does not bend or break easily. Some lights use marine-grade stainless steel. This type is even better against water and salt. Stainless steel keeps your lights looking good and working well.
Solid Glass
Solid glass covers are very tough. Makers use thick, tempered glass that does not scratch or break easily. Frosted or textured glass helps stop slipping and cuts down glare. Solid glass does not fade or change color. It can handle car tires without cracking. If you pick solid glass, your lights will last and look nice.
Waterproof Design
Waterproofing is very important for outdoor lights. Water can ruin wires and make lights stop working. Pick lights that are sealed and have a high IP rating.
Sealed Construction
A sealed light keeps out water, dust, and dirt. Makers use rubber gaskets, silicone seals, and tight covers. These things protect the wires and bulbs inside. Check the light for seals and ask how it is waterproofed.
IP Ratings
IP ratings show how well a light keeps out dust and water. For outdoor lights, you need a high IP rating. The table below explains some IP ratings:
|
IP Rating |
Protection Against Solids |
Protection Against Water |
|---|---|---|
|
IP65 |
Dust tight |
Water jets |
|
IP66 |
Dust tight |
Powerful water jets |
|
IP67 |
Dust tight |
Immersion up to 1m |
Pick IP67 rate lights for the best protection. These lights keep out all dust and can go underwater up to one meter. For example, Solar Paver lights have an IP67 rating. They work well in wet places and where cars drive a lot.
Note: Always check the IP rating before you buy. Higher numbers mean better protection and longer-lasting lights.
If you pick paver lights with strong materials, good drive-over ratings, and waterproof designs, your outdoor lights will be safe and last a long time. You protect your money and keep your driveway or patio looking nice.
Flush Fit
Surface Level
You want your in ground paver lights to sit flush with the surface of your driveway or walkway. A flush fit means the top of the light matches the height of the surrounding pavers. This design stops tires from bumping into the lights and keeps the area smooth for walking. If the lights stick up too high, people can trip or cars can damage the fixtures. If the lights sit too low, water and dirt can collect around them, which can cause problems over time.
To achieve a perfect flush fit, measure the depth of your pavers and the height of the light fixture. Many manufacturers provide adjustable housings or spacers. These tools help you match the light to the paver height. Always check the product details before you buy. Some lights work better with certain paver thicknesses.
Tip: Before you install, lay out the lights and pavers together. This step helps you see if the lights will sit at the right level.
Safety Considerations
A flush fit does more than look good. It keeps everyone safe. When you install lights at the same level as the pavers, you lower the risk of trips and falls. Cars can drive over the lights without hitting a raised edge. This design also helps with drainage. Water flows over the lights instead of pooling around them.
You should also think about the edges of the light. Rounded or beveled edges reduce the chance of tire damage and make the area safer for bare feet. Some lights come with anti-slip surfaces, which add another layer of safety, especially in wet weather.
Here are some key safety points to remember:
- Always check that the light sits level with the paver surface.
- Avoid lights with sharp or raised edges.
- Pick lights with anti-slip finishes for extra grip.
- Make sure the installation does not leave gaps or loose pavers.
A flush fit gives your outdoor space a clean look and helps your lighting last longer. When you choose in ground paver lights with a flush design, you protect both people and vehicles.
How to choose in ground paver lights?

Matching Design
You want your outdoor lights to look good with your driveway or patio. Many driveways use simple shapes and colors like gray or black. In ground lights with a plain style make things look neat. You can pick warm white, pure white, or lights that change color to set the mood. Straight lines help cars and people move safely and add style.
Here are some design ideas for modern driveways:
- Minimalist look: Use in ground lights for a smooth style.
- Fun style: Add string lights for decoration.
- Modern look: Put in bollard lights for a fancy feel.
You can place lights in different spots to show off features:
|
Design Option |
Description |
|---|---|
|
Light in Pavers |
Gives warm light without glare. Comes in many sizes and has a strong stainless steel frame. |
|
Highlight Driveway Border |
Use border stones with built-in paver lights for contrast and support. |
|
Uplift Pathway Borders |
Paver lights can make borders stand out along driveways and paths. |
|
Patios and Walkways |
Use lights to make patios, sitting areas, and walkways look better. |
|
Walls and Planters |
Put lights on walls and near planters for more light. |
|
BBQ/Firepit |
Use paver lights to brighten outdoor eating areas and make them cozy. |
Pick a design that matches your yard and what you like. This step helps your outdoor area look nice and welcoming.
Budget vs. Quality
You need to think about price and quality when picking in ground paver lights. Lights that cars can drive over cost more than regular ones. They use stronger materials and better waterproofing. Good lights last longer and can handle lots of cars.
Buy good lights if you want them to last and stay safe. Cheap lights might break or not work well in bad weather. Always read ratings and reviews before you buy.
Tip: Make a budget, but save some money for better lights. Good lights help you spend less on fixing or replacing them.
Planning Ahead
You should plan your lighting project before you begin. Think about where you want lights, like steps, walkways, patios, or driveways. Look at which spots need more light. New driveways are easier to work with. Old ones may need extra work.
Think about these things:
- Purpose: Decide if you want to show off borders, paths, or seats.
- Location: See if the spot gets lots of cars or needs more light.
- Fixture material: Pick strong materials like stainless steel or composite polymer.
- Light source: Choose LED colors that fit the mood you want.
- Wattage and number: Make sure your transformer can handle all the lights.
Plan your layout and wiring before you install. This step helps you avoid problems and keeps your lights working for a long time.
Mistakes to avoid when choosing in ground paver lights

Non-Rated Lights
Never pick in ground paver lights without a drive-over rating. Some lights look strong, but only tested ones can handle cars or trucks. If you use non-rated lights, they might crack or break. This can cost you money and make your driveway unsafe.
Drive-over rated paver lights use strong materials like stainless steel or solid glass. Makers test these lights for heavy loads. Always check the product details for a drive-over rating. If you do not see this rating, ask the seller or pick another light. Good brands show their ratings and test results. This helps protect your money and keeps your driveway safe for cars.
Tip: Look for words like "drive-over rated," "vehicular grade," or "heavy duty" in the product description. These words help you find the right paver lights for driveways and parking lots.
Ignoring Codes
You need to follow local building codes when you install in ground paver lights. If you ignore these rules, you could get in trouble or fail inspections. Towns want you to send lighting plans for review. These plans show where the lights go and how bright they are.
Here is a table with common code rules for paver light setups:
|
Requirement |
Description |
|---|---|
|
Plan Submission |
Send lighting plans for review and approval, including site and fixture details. |
|
Iso-footcandle Plots |
Show you meet the needed light levels for safety. |
|
Summary Table |
List the highest and lowest light levels for each area. |
|
Luminaire Description |
Give maker info, light data, and lamp type. |
|
Post-Approval Changes |
Send any changes to approved plans for review. |
|
Right of Inspection |
Let town officials check for code rules. |
Always check with your local building office before you start. Following codes makes sure your paver lights are safe and work well in driveways or parking lots. If you skip these steps, you might have to redo your work or pay fines.
Poor Installation
Bad installation causes lots of problems for in ground paver lights. If you do not install them right, they can crack, sink, or move. These problems happen if the base is weak, the sand is thin, or the pavers do not support cars.
The table below shows what can go wrong with poor installation:
|
Consequence |
Cause of Consequence |
|---|---|
|
Cracking |
Wrong installation or weak paver choice |
|
Sinking |
Weak base or thin sand |
|
Shifting |
Not enough support for cars and trucks |
|
Flipping/Pulling Up |
Pavers too thin for car weight |
|
Maintenance Issues |
Sand moves or sinks over time |
Always follow the maker’s instructions when you install paver lights. Use the right base and make sure the lights are level with the surface. If you rush or skip steps, you can damage the lights and the pavers. Good installation keeps your driveway safe and your paver lights working for a long time.
Note: Hire a pro if you are not sure about installing drive-over rated paver lights. Experts know how to get the site ready and use the best ways for strong results.
Skipping Maintenance
Lots of people forget to take care of their in ground paver lights after putting them in. Some think they do not need to check the lights once they are installed. This is a mistake that can cause problems with safety and how well the lights work. It can also make your driveway look bad. Regular care helps your paver lights stay bright and last longer.
If you do not do maintenance, you can have many issues. Dirt and leaves can cover the lens and make the light dim. Water can get inside if the seals break down. This can mess up the wires and make the light stop working. If you never look for cracks or chips, you might end up with broken lights. These lights cannot handle cars driving over them. Broken lights can trip people or hurt car tires.
You should make a simple plan to care for your in ground paver lights. Here are some important jobs to remember:
- Clean the lens and housing: Wipe away dirt and oil with a soft cloth and gentle cleaner. This keeps the light shining and helps drivers see at night.
- Inspect for water ingress: Look at the seals and gaskets to see if they are worn out. Check for water inside the light. If you find water, change the seal or get a new light.
- Check for physical damage: Search for cracks, chips, or loose parts. Replace any broken paver lights right away. This keeps your driveway safe for cars and people.
- Test electrical connections: Make sure the wires are tight and not rusty. Bad wires can make the lights flicker or stop working.
- Review anti-slip surfaces: Check if the textured glass or stainless steel covers still help tires and shoes grip. Change covers that are smooth or worn out.
Tip: Plan to do maintenance every three to six months. Write it on your calendar so you remember. Checking often helps you find problems early and saves money.
Here is a table to help you keep track of your maintenance jobs:
|
Maintenance Task |
Frequency |
Why It Matters |
|---|---|---|
|
Clean lens and housing |
Monthly |
Keeps light output strong |
|
Inspect for water ingress |
Every 3 months |
Prevents electrical damage |
|
Check for damage |
Every 3 months |
Maintains safety and drive-over rating |
|
Test electrical connections |
Every 6 months |
Ensures reliable operation |
|
Review anti-slip surface |
Every 6 months |
Reduces risk of slips and skids |
If you skip maintenance, you can lose the good things about your in ground paver lights. You might have to pay a lot to fix them, and your driveway will not be as safe. Your outdoor space will not look as nice. Taking care of driveway lights, patio lights, and walkway lights helps them last longer and work better. You protect your money and keep your yard safe by making maintenance a habit.
Remember, paver lights are made to handle tough weather, but they still need you to check on them. Take care of your outdoor lights, and you will have a bright and safe driveway for many years.
How to evaluate in ground paver lights?

Reading Specifications
Check the specifications before you buy in ground paver lights. Makers list important details to help you choose the right product. These details show if the lights fit your driveway or parking area.
- Durability: The best drive-over paver lights last in tough weather. They can handle heavy cars and trucks. You want lights that work in rain, snow, and sun.
- Drive-Over Rating: This rating shows if cars or trucks can drive over the lights. Always pick vehicular grade paver lights for driveways.
- Outdoor Rate Materials: Stainless steel, solid glass, and composite polymers do not rust or break easily. These materials help your LED paver lights work well outside.
- Safety Features: Tamper-resistant covers and sealed wiring help stop electrical shock. These features keep your family and guests safe.
Read the technical sheets and installation guides. These papers show weight capacity, IP rating, and slip resistance. If you see all these details, the lights are ready for cars and trucks.
Tip: Compare specifications from different brands. Pick the one that has all the safety and durability you need.
Comparing Reviews
Customer reviews and ratings teach you a lot. People share their stories about installing and using in ground paver lights. Look for reviews that talk about drive-over strength, waterproofing, and how easy it is to take care of the lights.
Check for these things in reviews:
- Did the lights hold up under heavy cars?
- Was it easy or hard to install the lights?
- Did the lights stay bright after many months?
- Did anyone say water or dirt got inside?
- Did the anti-slip surface help in wet weather?
Read both good and bad reviews. This helps you find common problems and good points. If lots of people like a brand for its drive-over rating and outdoor-rated materials, you can trust that product more.
Note: Verified purchase reviews are the most honest. Look for photos and updates from people who put the lights in driveways or patios.
Warranty and Support
Warranty terms show if the maker trusts their paver lights. You want a strong warranty that covers defects and problems from normal use. Most brands give coverage for a few years. The table below shows a typical warranty for in ground paver lights:
|
Warranty Type |
Duration |
Coverage |
Exclusions |
|---|---|---|---|
|
Paver Lights |
3 years |
Defects in material and workmanship under normal use |
Misuse, improper installation, environmental damage, acts of God, and water damage conditions. |
Read the warranty details before you buy. Some warranties do not cover damage from bad installation or extreme weather. If you install the lights yourself, follow the instructions carefully. Good support means you get help if something goes wrong.
Note: If you have questions about warranty or support, ask the maker or supplier. Good brands answer fast and help you fix problems.
When you check in ground paver lights, you make sure your money is well spent. You get safe, bright, and strong lighting for your driveway or patio. Always check specifications, read reviews, and know the warranty before you pick your outdoor lights.
How to install in ground paver lights?
You must get your site ready before you put in ground paver lights. Good prep helps the lights last and stay safe when cars drive over them. Here are the steps to get your driveway ready:
-
Plan Your Layout
First, decide how many lights you need and where they should go. Mark each spot with spray paint or chalk. This helps you space the lights evenly and not make mistakes. -
Position Electrical Boxes
Put electrical boxes at every marked spot. Make sure each box is steady and lines up with your plan. This makes wiring much easier later. -
Protect Flanges Before Pouring Concrete
Put plastic caps into the flanges of each light. These caps keep cement out of the fixture when you pour concrete. If you forget this, you could break the lights or block the wires. -
Pour and Cure Concrete
Pour the concrete and let it dry all the way. Do not hurry this step. Dry concrete makes your driveway strong and keeps the lights in place. -
Remove Caps and Prepare for Wiring
When the concrete is dry, take off the plastic caps. Clean the flange and put on some grease. This helps the trim slide in and keeps water out.
Tip: Always check your marks and box spots before you pour concrete. Small mistakes now can cause big problems later.
A well-prepped site gives your in ground paver lights a strong base. You lower the chance of shifting, cracks, or water getting in. Careful planning and protection help your lights work well for a long time.
DIY vs. Professional
When you put in in ground paver lights, you have two choices. You can do it yourself or hire a professional. Each choice has good and bad sides. Your pick depends on your money, skills, and how hard your project is.
If you do it yourself, you control the whole job. You pick where each LED paver light goes. You choose how to run the wires. You decide what looks best for your driveway. Many people like finishing a project with their own hands. Doing it yourself also saves money because you do not pay for labor. This makes drive-over rated paver lights cheaper for big driveways or patios.
But doing it yourself takes time and work. You need to know some landscaping and electrical basics. You must get the site ready and set up the wires. Each light needs to be level with the pavers. If you make mistakes, the surface can be uneven. Water might get in, or the lights could break under cars. If you are not sure what to do, you might spend more time fixing problems.
Tip: If you want to install driveway paver lights yourself, read all the instructions. Follow safety rules. Go slow and check your work at every step.
A professional installer brings skill and speed to the job. They use special tools and know the best ways to put in in ground paver lights. You get good work done fast. Experts know how to handle tricky wiring and waterproofing. They make sure the lights fit flat with the pavers. They also know local rules and help you avoid mistakes.
Professional work costs more than doing it yourself. Labor fees can make your project cost more, especially for big driveways or custom jobs. Some people like to pay for expert help to get good results and less stress.
Here’s a simple chart to help you choose:
|
Option |
Pros |
Cons |
|---|---|---|
|
DIY |
Needs skill, takes time, mistakes possible |
|
|
Professional |
Good quality, fast finish, expert help |
Costs more, less control for you |
Think about what matters most to you before you decide. If you feel sure about your skills and want to save money, doing it yourself can be fun. If you want the job done right with no trouble, hiring a pro may be better.
No matter what you pick, focus on safety and making the lights last. Good installation helps your in ground paver lights handle cars and bad weather. Well-done driveway paver lights make your outdoor space look great for a long time.
How to maintain in ground paver lights?

Replacements
You need to replace in ground paver lights when they stop working or show signs of damage. Regular checks help you spot problems early. If you see a cracked lens, faded LED, or water inside the fixture, plan for a replacement soon. Damaged paver lights can cause safety risks for cars and people.
Follow these steps to replace your driveway paver lights:
-
Turn Off Power
Always turn off the power before you start. This step keeps you safe from electric shock. -
Remove the Old Fixture
Use a screwdriver or the tool provided by the manufacturer. Gently lift the old light out of the paver. Avoid damaging the surrounding pavers or wiring. -
Check the Wiring
Inspect the wires for rust or wear. Replace any damaged wires before you install the new LED paver light. Good wiring helps your new light last longer. -
Install the New Light
Place the new fixture into the opening. Make sure it sits flush with the surface. Connect the wires using waterproof connectors. Tighten all screws and seals to keep water out. -
Test the Light
Turn the power back on. Check if the new paver light works and sits level with the other pavers. If you see any issues, fix them right away.
Tip: Keep extra paver lights and connectors on hand. Quick replacements help you keep your driveway or patio safe and bright.
You should always use drive-over rated paver lights for replacements. These lights handle the weight of cars and trucks. Choose products with a high IP rating and anti-slip surface for best results. If you use solar paver lights, check the battery and solar panel during replacement.
Here is a table to help you decide when to replace your in ground paver lights:
|
Problem |
Action Needed |
Why Replace? |
|---|---|---|
|
Cracked or broken lens |
Replace fixture |
Prevent injury and water damage |
|
Flickering or dim light |
Replace LED module |
Keep area well-lit and safe |
|
Water inside fixture |
Replace and reseal |
Stop electrical failure |
|
Loose or uneven fit |
Reinstall or replace |
Ensure drive-over safety |
Replacing your in ground paver lights keeps your outdoor space safe and looking good. You protect your investment and make sure your driveway lighting works for years.
Seasonal Care
Seasonal changes affect your in ground paver lights. You need to adjust your maintenance routine as the weather shifts. Each season brings new challenges for driveway paver lights.
Spring
You should inspect your LED paver lights after winter. Snow and ice can cause cracks or loosen fixtures. Clean away salt and debris that may have built up. Check for water ingress and test each light. Replace any drive-over rated paver lights that show damage. Spring is a good time to check wiring and seals. Make sure all connections stay tight and dry.
Summer
High temperatures and strong sunlight can fade or weaken some materials. You need to clean the lens and housing more often. Dust and pollen can block light output. Inspect the anti-slip surface to keep your driveway safe. If you use solar paver lights, check the solar panels for dirt or leaves. Wipe them clean so they charge well. Test the brightness of your outdoor paver lights at night. Replace any dim bulbs or modules.
Fall
Leaves and rain can cover your in ground paver lights. Remove leaves and debris every week. Wet leaves can make the surface slippery and hide cracks. Check the drainage around each fixture. Water should flow away from the lights. Inspect the seals and gaskets before heavy rain starts. Make sure your LED paver lights stay flush with the pavers. If you see any shifting, adjust the fixtures right away.
Winter
Cold weather and snow put extra stress on driveway paver lights. Brush off snow and ice after each storm. Do not use sharp tools that might scratch the lens or housing. Salt and chemicals can damage the finish. Rinse the area with water if you use de-icing products. Test the lights often, especially after freezing rain. Replace any drive-over rated paver lights that crack or lose brightness.
Tip: Create a seasonal checklist for your paver lights. Write down tasks for each season. Regular care helps your in ground paver lights last longer and keeps your driveway safe.
Here is a simple table to help you plan your seasonal care:
|
Season |
Key Tasks |
Why It Matters |
|---|---|---|
|
Spring |
Inspect, clean, check wiring |
Fix winter damage |
|
Summer |
Clean lens, check solar panels, test brightness |
Prevent fading and dim lights |
|
Fall |
Remove leaves, check drainage, inspect seals |
Stop water and debris buildup |
|
Winter |
Brush snow, rinse salt, test after storms |
Prevent cracks and corrosion |
Seasonal care protects your investment in outdoor paver lights. You keep your driveway bright, safe, and looking great all year. Regular attention helps your LED paver lights handle every season with ease.
When picking in ground paver lights for driveway, look for ones with a high drive-over rating. Make sure they are waterproof and sit flat with the ground. Installing them the right way keeps everyone safe and helps the lights last longer. Always check product details and read reviews before buying. If you are not sure what to do, ask a professional for help. Choosing carefully keeps your outdoor area safe and bright.
FAQ
What does "drive-over rated" mean for paver lights?
Drive-over rated paver lights are made to hold up cars and trucks. You can put these lights in driveways or parking lots. Makers test them to make sure they are strong and last a long time.
Can you use LED paver lights in wet climates?
You can use LED paver lights in wet places if they have a high IP rating. Look for IP67 or higher to keep water out. Waterproof outdoor paver lights stop water from getting in and help keep your driveway safe.
How often should you clean driveway paver lights?
You should clean driveway paver lights once a month. Use a soft cloth to wipe away dirt and dust. Cleaning often helps LED paver lights stay bright and work longer.
Are solar paver lights strong enough for cars?
Solar paver lights with a vehicular grade rating can hold cars. Always check the product details to be sure. Pick solar paver lights made for driveways and heavy loads.
Do in ground paver lights need professional installation?
You can put in in ground paver lights by yourself if you follow the steps. For tricky wiring or big jobs, hire a professional. Good installation keeps drive-over rated paver lights safe and secure.
What materials work best for outdoor paver lights?
Stainless steel and solid glass are best for outdoor paver lights. These materials do not rust or crack easily. You get driveway paver lights that last and handle bad weather and traffic.
How do you know if paver lights are safe for vehicles?
Look for a vehicular grade or drive-over rating in the product info. Makers list how much weight the lights can take and what tests they passed. Safe paver lights protect your driveway and your cars.
Can you replace damaged in ground paver lights easily?
You can swap out broken in ground paver lights by turning off the power, taking out the old light, and putting in a new one. Always use drive-over rated paver lights when you replace them.